In my last post, I explained how my awesome hubby got me a membership in the winter session of the Soap Crafting Club for my birthday. It’s been so much fun so far! And I’m still obsessed with that Blackberry Sage funnel pour soap made in my first adventure. I. LOVE. THAT. SCENT!
Whereas my first soap came off without a hitch, my second adventure was an entirely different experience!
February’s soap was one that I was really looking forward to creating: an avocado moisturizing bar. Here’s what came in my kit:
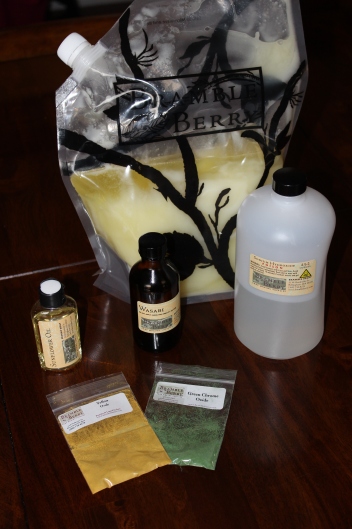
Premixed oils, lye solution, Wasabi fragrance oil, Green Chrome oxide, Yellow oxide, and a bit of sunflower oil for mixing the colorants.
Looks simple enough based on the supplies in the kit, right? Wrong. Keep reading. You’ll see…
Just as before, I armed myself with information galore, watched the videos a few times, and read and reread the recipe in the book. On soaping day, I set up my Soap Crafting book and computer beside my soaping station, pureed my avocado with a bit of distilled water, and prepped my colorants.

I especially love the darkest green chrome oxide color. So pretty.
As it was still snowing outside, I had to heat up my cold oils to get them nice and fluid. Since my lye solution was also pretty cold, I decided to add it to the 126 degree oils, thinking it would even out in the end. It did bring the overall temp down, but I didn’t realize how big of a deal this was until I really got into making the soap. Holy moly, did it trace fast!!!

Adding avocado puree to the soap batter.
I’m not sure if it was the combination of oils and avocado, the heat, or the Wasabi fragrance oil (which is very floral), but this soap sure did set up quickly.
By the time I added the colors, the soap was nearly unworkable. I had to squash the bottom dark green layer of soap into the mold, then I pushed the next lighter green layer in, and finally I scooped the yellow soap on top. Yes, I said scooped. The soap was already soap! I tried desperately to mix it with my whisk, then with my spatula, but it wasn’t budging.

See how thick it was?
I had to peel that yellow soap out of the mixing bowl like I would scoop ice cream, and then I used my gloved fingers to push it off the spoon and mound it up. In fact, I wished it would melt like ice cream. It would have been easier to work with! There was most certainly no making this pretty with swirls on top. I can’t believe I was actually able to salvage it at all!
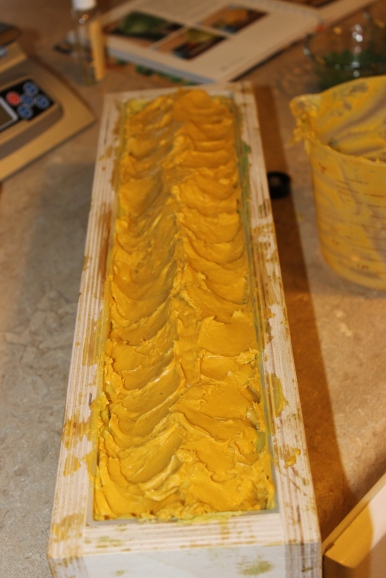
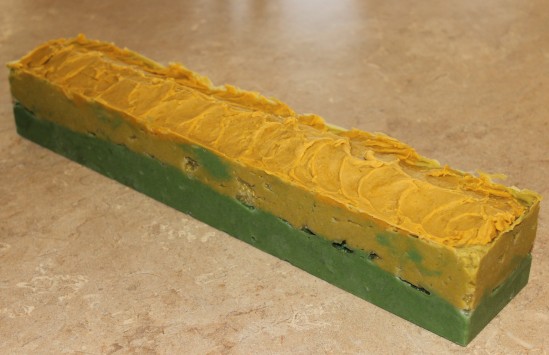
And here it is, smashed into the mold.
Since I knew this soap was so hot already and risked having a partial gel, I didn’t even attempt to put it in the freezer like Anne-Marie suggests in her book. I’m an all-or-nothing kind of girl, so I went for FULL gel! I put the soap in my oven, but I didn’t turn the oven on; I just let it hang out in there, doing it’s thing.
About 12 hours later, it was already hardened enough to unmold and cut! It was really interesting peeling the silicone mold away from the sides of this one. I expected to find lots of air pockets, but I found even more than that! Check it out!
What do you call that?
I found a few of those funky pockets down each side of the loaf, along with some air pockets (though fewer than I expected!).
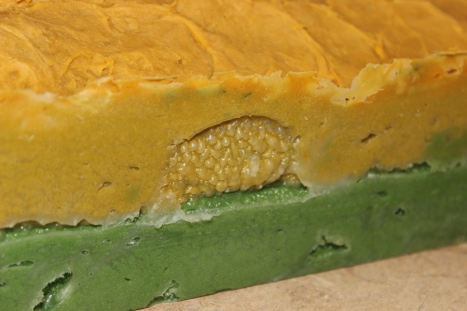
Cutting this soap was fascinating! Once opened up, I found glycerin rivers everywhere. Apparently the soap got hot enough for the glycerin to begin separating, and it made some really cool effects.
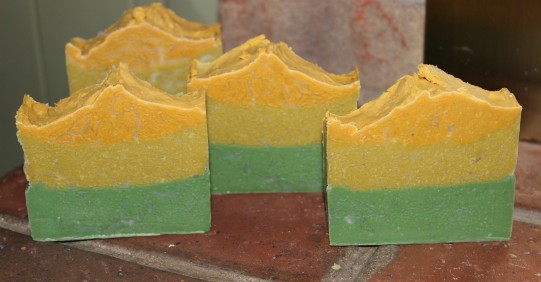
See the rivers all over? Pretty cool. And I can’t believe the layers turned out so even after all that smashing and pushing!
Just a few weeks later, Anne-Marie wrote up this post on her blog about this very subject! The heat of the soap and the oxide colorants were the culprits.
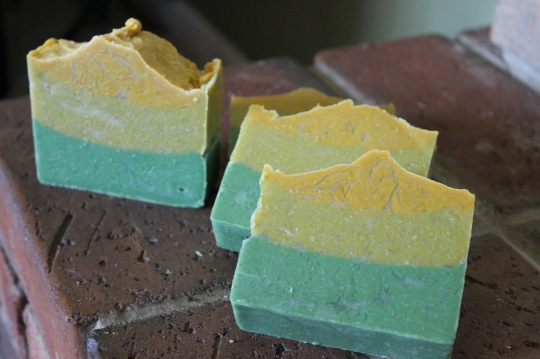
Here’s a shot of the soap in natural lighting, showing the transparency of the glycerin rivers.
Though this was completely unintentional, I’m glad these rivers happened! This soap is so unique and pretty.
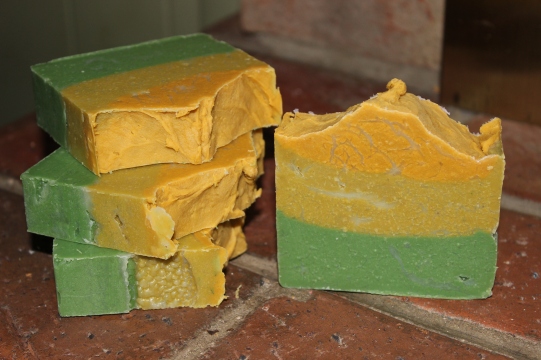
I know this is far from perfect, but I just love the interesting details, from the weird alien brain bubbles on the sides to the rivers running everywhere.
This is a really fascinating soap. I’d like to try making it again to see if I can replicate the original soap design, the one without gel phase or glycerin rivers! I’ll definitely soap at lower temperatures next time! And I’m also anxious to try my hand at using other real foods in soaps.
Want to see my final adventure from Winter Session of Soap Crafting Club? It’s here!
Thanks for stopping by!
Pingback: Soap Crafting Club Adventure #3: Tie-Dye Soap | Five Messy Babies
Pingback: Soap Crafting Club Adventure #1: Funnel Pour | Five Messy Babies
I saw this on a soap queen post once- they called it alien brains if I remember right 😉 Great colors- I like them a lot!
Pingback: July Soap Crafting Club: Oatmeal Layers | Five Messy Babies
Pingback: Psychedelic Green Tea Soap | Five Messy Babies