Once again, we’ve had a great Soap Challenge Club tutorial this month thanks to Amy Warden of Great Cakes Soapworks and her guest instructor, Tatsiana Serko of Creative Soap by Steso. The Cosmic Wave technique proved to be a good challenge that I found to be quite fascinating too. When I’ve done in-the-pot swirls in the past, I’ve noticed that at times there are some really cool “cosmic” lines that appear, and I’ve never been able to pinpoint why. Now I know! When the perfect thin trace meets the perfect slow pour at the perfect low height in the mold, voila! Cosmic waves!
As instructed, I used a great slow-moving soap recipe of 35% olive oil, 30% lard, 25% coconut oil, and 10% rice bran oil. It’s the original slow recipe that Amy shared a few years ago when the club was just starting, and I love the soft feel that the soap produces. I also added some skin-loving goodies like colloidal oatmeal, goat milk, and silk to this soap, as well as 1 teaspoon sugar per pound oils to the lye solution to help give a bubblier lather. (Some soapers also tout that adding sugar helps to keep the soap from moving too quickly. I’m not sure if that’s true, but I’ve never found that adding sugar speeds up trace, either, so I’ll go with it!) My fragrance of choice was Lavender Fleur, a lovely feminine fragrance that doesn’t accelerate or discolor the soap. White was my base color, and I used Grape Nehi mica and The Maniacal Pea mica from Mad Oils as well as some black oxide for good contrast colors in my “waves.”
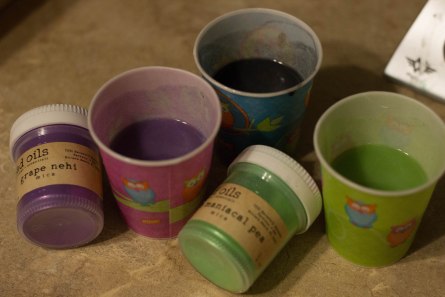
Soap colors prepped and ready to do in-the-pot swirling before making cosmic waves!
My oils and lye were at about 80 degrees when I blended them, pulsing quickly just a few times and mostly stirring by hand to get a good emulsion. I poured off a total of 15% of my soap into the 3 different colors (in cute 5oz. owl Dixie cups). Then, I blended titanium dioxide into the main soap bowl with another few pulses of the stick blender. This brought my soap to the perfect thin trace. I poured some white into a smaller measuring cup, then poured thin lines in a grid pattern with each of my colors.
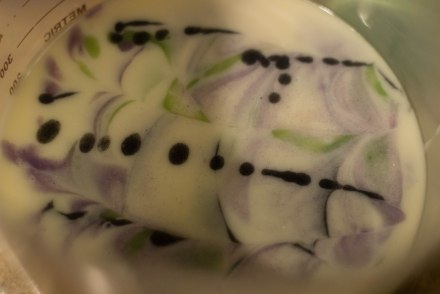
My soap was still a little thin for the in-the-pot swirls at first, but it worked!
Then came the fun! I poured the soap into my 9-bar Birchwood slab mold from Bramble Berry. The key was to pour very close to the mold, very gently, moving the cup of soap very slowly down the length of the mold. The soap kind of folds softly into the mold creating zig-zagging lines and waves.
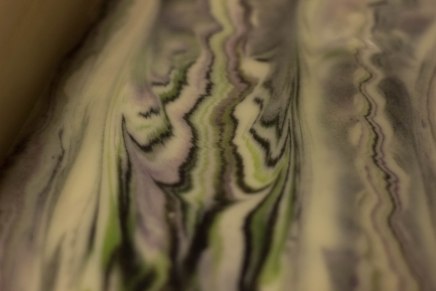
These waves are looking pretty cosmic after the first few passes!
It’s so cool! I repeated this process several times until all of the soap was gone.
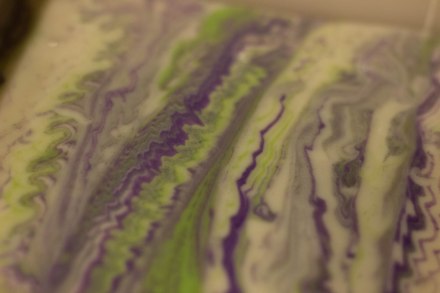
Aren’t those lines so cool?! You can see here how the soap really remained fluid throughout the pouring. That slow-moving recipe is magical!
I attempted to spin the mold a bit to make the waves even wavier, but I found that the soap was still so fluid that it made the edges begin to get muddy! Adding the dividers displaced the waves just a bit as well, but I still found several fun lines in each bar. Check it out!
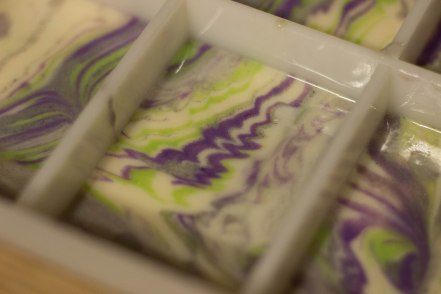
Lavender Fleur cosmic waves!
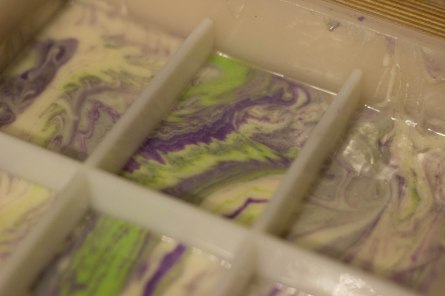
The middle bar looks pretty good, but you can see the muddied outer edges of the other bars.
I found that the white soap at the bottom of the pot became a bit muddy toward the end of each pour. In fact, there was a lot of white and muddied gray soap toward the very end, and I’m a bit disappointed with the final pour that came out. I should have reserved a bit of colored soap to add to the pot just before finishing the pour. Live and learn! Now I know for next time. And there WILL be a next time!!
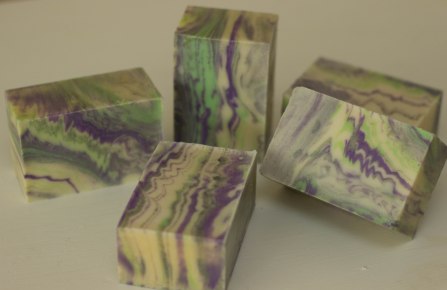
This Lavender Fleur soap turned out pretty cosmic! All of the waves are different, and I love how the dividers pulled the lines down the sides of each bar too!
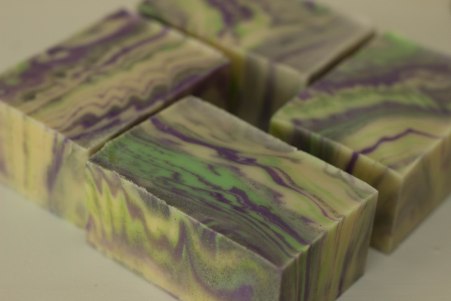
Even the edges are cosmic!
These soaps are each so interesting and artistic. They’ll change design with each use, exposing more cosmic waves with every exposure to water. Super fun to use, and they smell divine too!
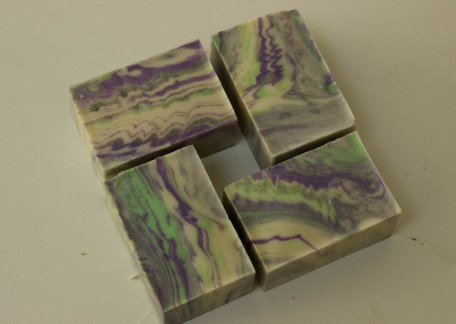
Lavender Fleur soaps
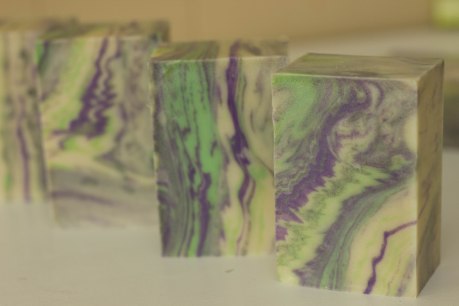
I love the swirl at the top of the bar on the right! I think that occurred when I spun the mold a bit.
I love this simple yet challenging technique, and I’ll definitely be doing it again. I appreciate that Amy gave us links to several variations of the technique at the end of the tutorial. I have a notion to try them all! Thank you to Amy, Tatsiana, and all of the fabulous soapmakers who participated in this challenge. I’ve learned a lot (as always) from everyone, and I have such fun watching the making-of videos, reading through blog posts, and browsing Facebook albums and Instagram photos. It’s such a joy to participate in these challenges!
And speaking of joy…may I introduce my newest joy?!
 Noah was born just 3 weeks ago! What a blessing he is. His sisters love him to pieces, and I can’t keep that mass of brown hair clean thanks to all of their sloppy kisses on his head! We are officially seven messy babies at my house!
Katy:
Congrats on the Baby Boy!!!
Love the colors and wave of your soaps!
Sly
Thank you, Sly!
Great work, Katy!! I love how magical this technique is! So much fun to see how the soap falls. You have some great colors and super cosmic waves! I’m so impressed that you managed to pull this off with a newborn – and what a cutie Mr. Noah is!! Congratulations!!
Thanks, Amy! Another great challenge!!
I’m sorry, Noah had me forgetting about cosmic waves 🙂 Congratulations!!!! God’s blessings on your household.
Thank you!
Félicitations for the firt boy Noah in your family
i love yours soaps stunning really
j’aime beaucoup Amy et Tatsiana je vous souhaite plein de bulles et une merveilleuse soirée
Merci, merci! 🙂
Wow! I can’t imagine how you have time to make soap with all the little joys running around your house. Congratulations, and your soap is lovely.
Thanks, Teressa. Honestly, I don’t have the time…I make the time. Making soap helps me to stay sane!
Oh my goodness, Katy! I don’t know which is more beautiful, your soap, or that beautiful baby boy! Congratulations on both!
That’s sweet. Thanks, Debi!
OMG! You amaze me, finding the time to make soap with such a big family! Congratulations on your new baby! .. and great job with the challenge! 🙂
Thanks, Helene! 🙂
Aww, congratulations on your sweet baby boy! 😀
Thank you for sharing your process! I love seeing how the sides of your bar came out too, you can see how the pattern runs all the way through the bar!
Congrats on mastering the technique,
Cheyenne @ Canfield Handcrafted Soaps
Thanks, Cheyenne. I like to show the whole process since I love to read other soap makers’ posts that show the process too! Hopefully we can learn from one another in these challenges. So fun!
Great Color choices, your soap is beautiful and so is you new baby.
Thanks!